

BO7 Power Switch Relic Guide Buy COD Points Cheaper at U4GM
Stuck on the Totenreich relic puzzle because your gun suddenly feels like a prop? That is the nasty little joke behind the Power Switch Relic, and if you are testing routes in a CoD BO7 Bot Lobby before risking a real run, I do not blame you. This quest rewards calm planning more than raw aim.
Power Switch Relic Basics on Totenreich
What the relic actually changes
The Power Switch Relic is one of Totenreich's Grim Relics tied to Cursed Mode progression in Black Ops 7 Zombies. Its drawback is simple but annoying: at the start of every round, your lethal and tactical equipment is randomized. Your weapon damage, health, armor, and movement are not directly nerfed, which is why I rate this as one of the friendlier relic choices for players who trust their gunplay.
That said, “friendly” does not mean free. Losing a Monkey Bomb and getting stuck with a Frag Grenade at the wrong moment can wreck a late-round holdout. Personally, I would rather manage random equipment than take a direct damage penalty, but solo players should still treat this as a real modifier.
What to prepare before starting
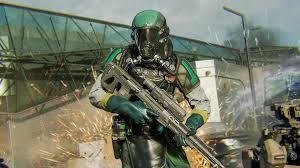
Bring a Combat Axe and a scoped weapon. The Shadow SK Sniper Rifle near Tyr's Shoulder works nicely because you need clean visibility for altar checks. Bank at least 10,000 Essence before entering the trial portal, since you cannot earn Essence once the trial begins.
- Combat Axe for the bear pelt sequence
- Scoped rifle for reading deer skull counts
- 10,000 Essence for trap activations
- Aether Shroud or Disciple Injection for panic escapes
- Vulture Aid from Blodheim Hall if you want better resource awareness
How to Unlock the Power Switch Relic
Solving the altar and bear pelt puzzle
1) Visit the four altar locations: The Great Hall, The Courtyard, The Docks, and The Overlook. Each altar shows a randomized number of deer skulls, usually one through four. Write them down. Memory gets messy once zombies start chewing your ankles.
2) Go to Blodheim Hall and face the mounted bear pelts on the north and south walls. Throw the Combat Axe at the pelts in the order dictated by the skull counts. The awkward part is that the game does not clearly label which pelt belongs to which altar, so expect a bit of trial and error.
3) If you miss or hit the wrong pelt, reset immediately. No round skip, no huge punishment. Once the correct sequence lands, the Power Switch Relic portal appears on the south wall of Blodheim Hall.
Surviving the no-weapon-damage trial
Now here is the kicker: inside the portal, your weapons deal zero damage. Not reduced damage. Zero. The trial throws three waves at you, including standard zombies plus Acid and Frost variants, but no boss or High-Value Target spawns have been seen in the current Season 3 Reloaded version.
The cleanest method is to zipline to Beacon Island and use the Flammenfalle Trap. Each activation costs 1,000 Essence and has a 60-second cooldown, so seven to ten activations is the comfort zone. Train the horde near the trap, trigger it, then retreat toward the back-left side of the island. Breathe. Repeat.
Power Switch Relic Tips, Myths, and Smarter Runs
How to reduce the equipment randomizer pain
The randomizer only affects your starting equipment for the round, not every item you touch afterward. That detail matters. If the game gives you something useless, craft your preferred tactical or lethal at the Crafting Table and overwrite the bad roll for that round. A Monkey Bomb is still worth the Salvage if your squad is pushing higher Cursed Mode tiers.
Side note here: do not burn Aether Shroud just because the screen gets crowded. Save it for trap cooldown moments, especially when Frost zombies slow your exit lane. From what I have seen, greedy activations cause more failed trials than bad aim, which is funny because aim barely matters in this room.
Common myths players repeat
One myth is that Pack-a-Punch can brute-force the trial. It cannot. Weapon upgrades help before and after the portal, but environmental kills carry the trial itself. Another claim is that the Power Switch Relic ruins every serious run. Honestly, that feels exaggerated. It punishes sloppy equipment habits, not core shooting skill.
There is still some debate about the second Totenreich Grim Relic and whether future patches will make Tier 3 rewards more transparent. Treyarch already adjusted Acid and Frost spawn behavior and improved Overlook skull visibility, so more tuning would not surprise me.
Quick decision table
| Player Type | Best Approach |
|---|---|
| Solo beginner | Over-bank Essence and use Aether Shroud |
| Gun-focused player | Choose Power Switch over harsher combat penalties |
| Squad runner | Assign one player to track altar counts |
Your next run should start with a simple plan: gather Essence, record skull counts, practice the Beacon Island trap loop, and keep one escape tool ready; if you also use marketplaces such as U4GM for game currency or item services in other titles, apply the same mindset here by valuing preparation over panic. The Power Switch Relic is less about being flashy and more about not making the same expensive mistake twice.